Việc phát hiện chuyển động là một tính năng cơ bản của camera, nó làm việc này bằng phần cứng hoặc nhờ vào server của hãng. Nếu chúng ta biết được khi nào có chuyển động thì việc ghi hình không cần phải dò tìm chuyển động, khi đó RPi có thể làm việc với vài chục camera. Có thể nhờ vào ONVIF để biết điều gì xảy ra ở camera. Tuy nhiên, nhiều camera tuyên bố hợp chuẩn ONVIF nhưng lại không đúng hoặc chỉ theo kiểu ONVIF để không phải trả tiền cho ONVIF.
node.js có các thư viện thuận tiện để kết nối với camera ONVIF.
Cài đặt node.js
Vào trang Download | Node.js (nodejs.org) để lấy link tải phiên bản mới nhất, thí dụ ARMv7 version: 16.14.0
# tải về phiên bản node.js mới nhất
wget https://nodejs.org/dist/v16.14.0/node-v16.14.0-linux-armv7l.tar.xz

# giải nén
tar -xvf node-v16.14.0-linux-armv7l.tar.xz

# sao chép về /usr/bin
cd node-v16.14.0-linux-armv7l
sudo cp -R * /usr/local/

# kiểm tra node
node -v

# kiểm tra npm
npm -v
Chúng ta cần gói onvif từ github.com, nên cài đặt thêm git để tải về
apt install git
git clone https://github.com/agsh/onvif.git
hoặc dùng npm để tải bản mới nhất từ Github
npm install agsh/onvifTheo tác giả Andrew D.Laptev, có hai cách để lấy tín hiệu có chuyển động từ camera. Hoặc là thiết lập một ‘đường dây nóng’ để camera thông báo khi có event, hoặc dùng hàm callback kết nối với các sự kiện của camera.
Trong thí dụ sau đây, chúng ta chỉ in ra màn hình khi nhận được thông báo có chuyển động.
1. Thiết lập đường dây nóng
// Script hotline.js
// -----------------
// Thông tin về camera
let HOSTNAME = '<ip>',
    PORT = 80,
    USERNAME = 'admin',
    PASSWORD = '<password>';
    CAMID = 1001;

// các thư viện cần dùng
// script hotline.js đặt cùng cấp với thư mục lib
let Cam = require('lib/onvif').Cam;
let flow = require('nimble');
let http = require('http');

// đăng ký nhận event từ camera
new Cam({
  hostname: HOSTNAME,
  username: USERNAME,
  password: PASSWORD,
  port: PORT,
  timeout: 10000,
}, function CamFunc(err) {
  if (err) {
    console.log(err);
    return;
  }
  console.log('Đã kết nối với thiết bị ONVIF');
  let camObj = this
  flow.series([
    function (callback) {
      let receveUrl = "http://" + HTTP_IP_ADDRESS + ":" + HTTP_PORT + "/events/" + CAMID
      // đăng ký nhận event
      camObj.subscribe(
        { url: receveUrl },
        (err, subscription, xml) => {
          console.log('Đã đăng ký nhận events')
        }
      )
      callback()
    }
  ])
})

// Web server nhận events
// Dùng IP của máy chạy script này
let HTTP_IP_ADDRESS = '<ip_web_server>',
    HTTP_PORT = <port>;

// Tạo HTTP Server để nhận events từ port HTTP_PORT
server = http.createServer(function(req, res) {
  let body = '';

  // lấy dữ liệu post
  req.on('data', chunk => {
    body += chunk;
  })

  // hết dữ liệu
  req.on('end', () => {
    if (req.method == "POST") {
      // phân tích body để chọn event và xử lý, thí dụ có motion -> ghi clip
      let re = /(?<=tns1:)([^<]+)/g
      let match = re.exec(body)
      let msg = match[1]
      // có chuyển động
      if (msg === 'VideoSource/MotionAlarm') {
        re = /(?<=Name="State" Value=")(true|false)/g
        match = re.exec(body);
        if (match[1]==='true')
          msg += ': Motion Start'
        else
          msg += ': Motion Stop'
      }
      else msg += ': Skip'
      console.log(msg)
    }
  })
}).listen(HTTP_RECEIVER_PORT);
Để đăng ký nhận events, ta cần IP, user, password của camera. Password có thể là mã in dưới đáy camera, CAMID là tùy ý nhưng duy nhất không trùng với camera khác.
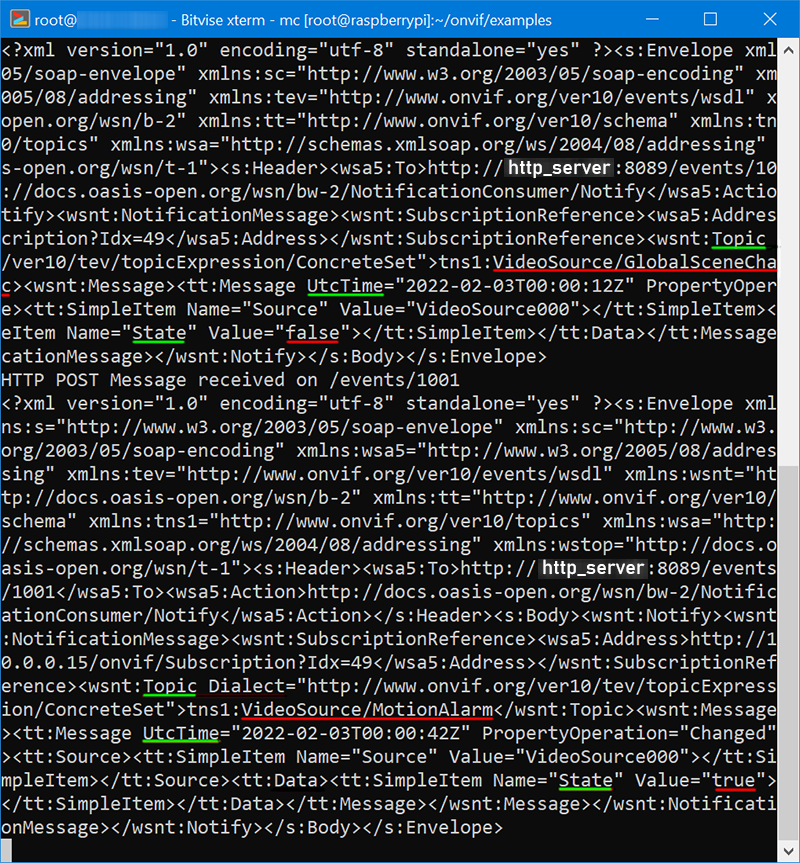
Đối tượng Cam được tạo từ thư viện onvif, có phương thức subscribe nhận http host để gởi thông báo qua phương thức POST. Camera sẽ gởi thông báo dạng xml về http host khi có event. Dùng cách xử lý chuỗi để lấy thông tin cần thiết hoặc để chính xác hơn, dùng SOAP.
Vì node.js tạo http host dễ dàng nên chúng ta tạo luôn trong trang đăng ký nhận events. Khi đó IP của host cũng là IP của máy chạy script, PORT là một port chưa dùng.
Event VideoSource/MotionAlarm được tạo khi có chuyển động (motion start) hay khi quá thời gian định trước mà không phát hiện gì thêm (motion stop). Đây là tín hiệu để chúng ta bắt đầu hay dừng ghi video.
Chạy script
node /path/to/hotline.js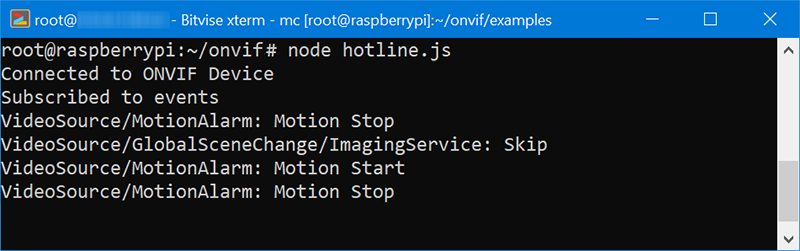
2. Cài đặt hàm callback
let HOSTNAME = '<ip>',
    PORT = 80,
    USERNAME = 'admin',
    PASSWORD = '<password>';

let Cam = require('../lib/onvif').Cam;
let flow = require('nimble');

new Cam({
  hostname: HOSTNAME,
  username: USERNAME,
  password: PASSWORD,
  port: PORT,
  timeout: 10000
  },
  function CamFunc(err) {
    if (err) {
      console.log(err);
      return;
    }
    console.log('Connected to ONVIF Device');
    let cam_obj = this;
    let hasEvents = false;
    let hasTopics = false;

    flow.series([
      function(callback) {
        cam_obj.getSystemDateAndTime(function(err, date, xml) {
          callback()
        })
      },
      function(callback) {
        cam_obj.getCapabilities(function(err, data, xml) {
        if (err) {
          console.log(err);
        }
        if (data.events) hasEvents = true;
          callback();
        })
      },
      function(callback) {
        if (hasEvents) {
          cam_obj.getEventProperties(function(err, data, xml) {
            if (err)
              console.log(err);
            else {
              let parseNode = function(node, topicPath) {
              for (const child in node) {
                if (child == "$") {continue;}
                else
                  if (child == "messageDescription") {
                    let IsProperty = false;
                    let source = '';
                    let data = '';
                    if (node[child].$ && node[child].$.IsProperty) {IsProperty = node[child].$.IsProperty}
                    if (node[child].source) {source = JSON.stringify(node[child].source)}
                    if (node[child].data) {data = JSON.stringify(node[child].data)}
                    hasTopics = true
                    return
                  } else {
                    parseNode(node[child], topicPath + '/' + child)
                  }
                }
              }
              parseNode(data.topicSet, '')
            }
            callback()
          })
        } else {
          callback()
        }
      },
      function(callback) {
        if (hasEvents && hasTopics) {
          cam_obj.on('event', (camMessage, xml) => {
            let eventTopic = camMessage.topic._
            eventTopic = stripNamespaces(eventTopic)
            let eventTime = camMessage.message.message.$.UtcTime;
            if (camMessage.message.message.data && camMessage.message.message.data.simpleItem) {
              if (Array.isArray(camMessage.message.message.data.simpleItem)) {
                for (let x  = 0; x < camMessage.message.message.data.simpleItem.length; x++) {
                  let dataName = camMessage.message.message.data.simpleItem[x].$.Name
                  let dataValue = camMessage.message.message.data.simpleItem[x].$.Value
                  processEvent(eventTime,eventTopic,dataName,dataValue)
                }
              } else {
                let dataName = camMessage.message.message.data.simpleItem.$.Name
                let dataValue = camMessage.message.message.data.simpleItem.$.Value
                processEvent(eventTime,eventTopic,dataName,dataValue)
              }
            } else if (camMessage.message.message.data && camMessage.message.message.data.elementItem) {
              let dataName = 'elementItem'
              let dataValue = JSON.stringify(camMessage.message.message.data.elementItem)
              processEvent(eventTime,eventTopic,dataName,dataValue)
            } else {
              let dataName = null
              let dataValue = null
              processEvent(eventTime,eventTopic,dataName,dataValue)
            }
          })
        }
        callback()
      }
    ]
  )
})

function stripNamespaces(topic) {
  let output = '';
  let parts = topic.split('/')
  for (let index = 0; index < parts.length; index++) {
    let stringNoNamespace = parts[index].split(':').pop()
    if (output.length == 0) output += stringNoNamespace; else output += '/' + stringNoNamespace
  }
  return output
}

function processEvent(eventTime,eventTopic,dataName,dataValue) {
  if (eventTopic == 'VideoSource/MotionAlarm'&& dataValue != undefined){
    let msg = (dataValue === true) ? 'start' : 'stop'
    console.log(eventTime + ', Motion ' + msg)
  }
}
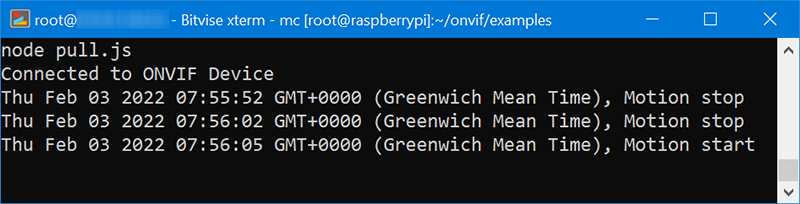
Khi có event, phương thức processEvent in ra ngày giờ xảy ra event và bắt đầu phát hiện chuyển động hay đã kết thúc rồi.
node-onvif-events
Là một gói viết sẵn, chỉ việc tải về và chạy
# Cài đặt
npm install --save node-onvif-events
Test script
const onvifEvents = require("node-onvif-events");

let options = {
  id: 1,
  hostname: '<cam_ip>',
  username: 'admin',
  password: '<password>',
  port: 80
};

const startMotion = async () => {
  const detector = await onvifEvents.MotionDetector.create(options.id, options);
  console.log(new Date(), '>> Motion Detection Listening!!');
  detector.listen((motion) => {
    if (motion) {
      console.log(new Date(), '>> Motion Detected');
    } else {
      console.log(new Date(), '>> Motion Stopped');
    }
  });
}

startMotion();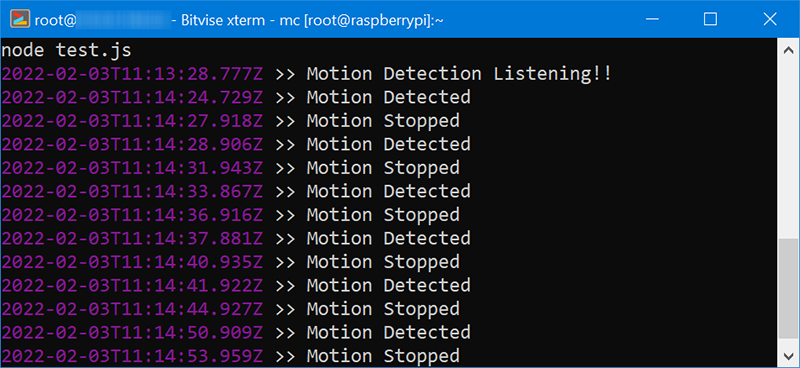
Chú thích
- Các script bên trên có thể chạy không hoàn hảo với một model camera cụ thể.
- Sau khi phát hiện chuyển động thì tiến hành ghi clip qua RTSP, công việc tốn rất ít CPU. Ngoài ra còn phải cache RTSP để có thể ghi dữ liệu vài giây trước/sau khi phát hiện/kết thúc chuyển động.